The ability to add structure to Visio diagrams using containers, lists, and callouts was introduced in Visio 2010 and has remained a key feature of every version of Visio since. In this article we’ll examine lists. We’ll explore containers and callouts in separate articles.
Prior to reading this article, it would help to read my article about Containers, because a list is actually just a special type of container.
A list is a type of container that maintains objects in ordered sequence, just like you might do with a numbered list in Word. The difference is that a Visio list typically contains shapes rather than words, phrases or sentences.
When you drop a shape into a Visio list, it takes a specific place before, between, or after existing shapes. The best part is that this isn’t just a visual convention — each list member actually knows its relative position in the list. You can use a shape’s ordinal position data in Visio macros, Visual Basic for Applications (VBA) or other programs to build interesting applications.
Just as a shape knows its position in a list, every Visio list knows how many shapes it contains, which can also be useful when building a Visio application.
Let’s start with a simple example to illustrate the concept: we’ll build a list that shows the sequence in which we want to install software on a new PC. In the figure below, the stack of shapes on the left represents the software items we want to install. The shape on the right is a Visio list that represents the PC.
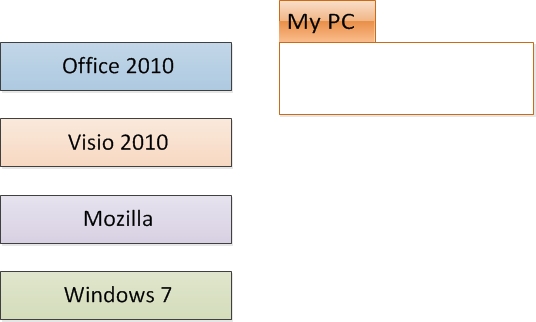 In the following figure, I’ve added Visio 2010 and Office 2010 to the installation list. Notice several things about the behavior of the list: 1) the dimensions of the list expand automatically as you add objects; 2) the text displayed on the “software” shapes includes each shape’s ordinal position in the list.
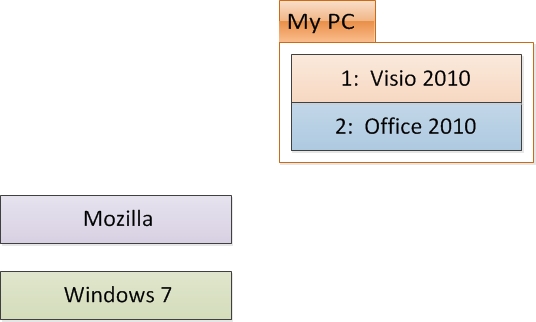 Next, I’ll change the list to indicate that we need to install the operating system and web browser first. To indicate that we need to install Windows 7 first, just drag that shape to the top of the list. Next, drag Mozilla and position it between Windows 7 and Visio 2010.
Notice that the Visio 2010 and Office 2010 shapes are renumbered automatically to reflect their new positions in the list.
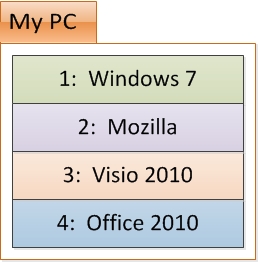 Finally, I want to indicate my preference to install Office before Visio. I do this merely by dragging Office 2010 above the Visio 2010 shape. Once again, the shapes are renumbered automatically.
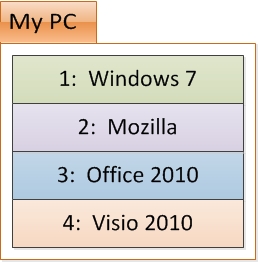
Important note: shapes in a list do not automatically display their position. The “software” shapes used in this example began as ordinary rectangles, to which I added a shape data field to contain the name of a software product. I also added three sets of cells in the ShapeSheet for the rectangle; these cells determine each shape’s ordinal position. As you probably noticed, the display of the sequence number is conditional: you only see it if the shape is inside a list. (The techniques for adding properties like this are beyond the scope of this article but will be covered in a future article.)
As described in the preceding paragraph, the “software” shapes in Example 1 were created to display information about their positions in the list. However, displaying list position is certainly not a requirement, and in Example 2 you will see ordinary shapes added to a list.
Let’s start with an empty list shape that has been labeled “Store Shelf”. The position and style of the “Store Shelf” heading were chosen from the Heading Style gallery on the Container Tools contextual tab (when you select the list shape, the contextual tab will appear on the Visio ribbon).
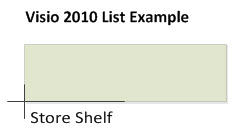 We’re going to add a shape to the list by dragging a Tablet computer from Visio’s Computers and Monitors stencil. Notice the orange border that appears as you drag the shape into the list – this is Visio’s way of telling you that you are working with a container or list.
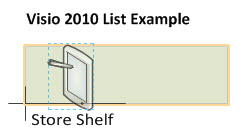 When you drop the shape into the list, Visio automatically resizes the list. This is one difference between a container and a list: Visio resizes lists automatically and you cannot change the size; containers, on the other hand, can be configured to allow manual resizing by the user.
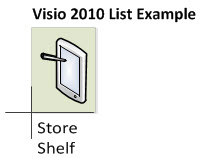 In the three images below you see another type of visual feedback that Visio provides for lists when you add new items. Visio displays an orange insertion bar to show specifically where a new shape will be added, allowing you to pick the location. The screen shots for Example 1 above were taken after the shapes were dropped into the container so you don’t see the insertion bars, however, they were present when the software shapes were being added. (In the center image you see a popup label that appears above the insertion bar if you hover for a couple of seconds.)
 After dropping several additional shapes into the list, it looks like the image below.
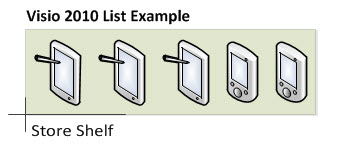 One other observation about this list compared to the one in Example 1: notice that this list grew from left to right, while the Example 1 list grew from top to bottom. (Bottom to top and right to left are also possible.) List direction is a property of the list shape, however, setting it requires modifying an entry in the Visio ShapeSheet; refer to the Additional Information section below for links to technical resources on lists and containers.
Important note: Visio includes a gallery of predesigned containers. There is no corresponding gallery of lists. Consequently, to create a new list you must either copy and modify an existing list, or understand enough technical details to create your own (see the articles from the Visio Insights blog cited in the Additional Information section below).
For more information about containers, lists and callouts in Visio, refer to Chapter 11 in Visio 2010 Step by Step or Visio 2013 Step by Step, or Chapter 13 in Visio 2016 Step by Step. All three books are available from my website or wherever you buy books.
You will also find information about lists in several articles on the truly excellent Visio Insights blog written by the Visio development team, including:
=-=-=-=-=-=-=-=-=-=-=-=-=-=-=-=-=-=-=-=-=-=-=-=-=-=-=-=-=-=-=-=-=-=-=-=-=-=-=-=-=
If you liked this article and want to see more from this author, please click here.
If you found this article helpful, please click the Yes button near “Was this article helpful?” below.
To learn more about Visio 2010, please visit the Visio 2010 Step by Step web site.
=-=-=-=-=-=-=-=-=-=-=-=-=-=-=-=-=-=-=-=-=-=-=-=-=-=-=-=-=-=-=-=-=-=-=-=-=-=-=-=-=
Have a question about something in this article? You can receive help directly from the article author. Sign up for a free trial to get started.
The Original Tech Community
